Get Started With the Opportunity Directory
The Opportunity Directory is an online catalog of the tasks, jobs, events, and other volunteer opportunities you've chosen to advertise. This directory is available publicly, so you can share information about your volunteer positions with prospective and existing volunteers alike. Each Assignment that you've chosen to advertise will have a profile in your Opportunity Directory, and that profile will include information from the Assignment's record, including address and contact information, profile information, descriptions, and schedules.
Choose Which Assignments to Include
Your Opportunity Directory will only include Assignments that you choose to make public. So the first step will be to decide which Assignments you'd like to include in your Opportunity Directory. You can choose which Assignments to include using the Advertise checkbox in your Assignment records. We recommend going through each of your Assignment records to check this box for any you'd like to include and to uncheck it for any you'd like to exclude. Here are some steps you can follow to do this:
- Choose Assignments from the menu.
- Click the link for an Assignment you'd like to include or exclude from the Opportunity Directory.
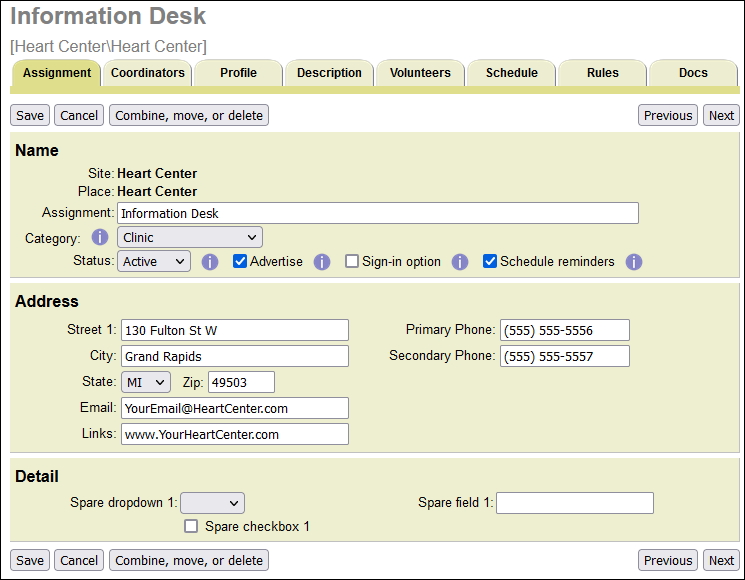
- On the Assignment tab of that record, check the Advertise checkbox to include that Assignment in the Opportunity Directory, or uncheck this box to exclude it.
- Click the Save button.
You can repeat these steps for each Assignment you'd like to review for inclusion in your Opportunity Directory. You can select Assignments from the menu to navigate to a different Assignment, or click the Previous or Next button to move to a new Assignment.
Please Note
If you choose to organize your Assignments in the Opportunity Directory by Site and Place (explained below), the directory will also include profiles for Sites and Places that have advertised Assignments. Site and Place records will not have their own Advertise checkbox. If a Site or Place has any advertised Assignments, they will be included, and if they have no advertised Assignments, they will be excluded.
Add Information to Your Assignments
Each profile included in your Opportunity Directory will pull information from the corresponding Site, Place, and Assignment record. After choosing which Assignments to include, your next step will be to enter information in those records.
Assignment profiles can include information from the Assignment, Profile, and Description tabs of your Assignment records, and you'll be able to choose which information from these tabs will be included (as shown in the next section). Site profiles can include information from the Site and Mission tabs, and Place profiles can include information from the Place and Mission tabs.
The Site, Place, and Assignment tabs all include general information about the record. This includes things like the name of the record, contact information, and location information.
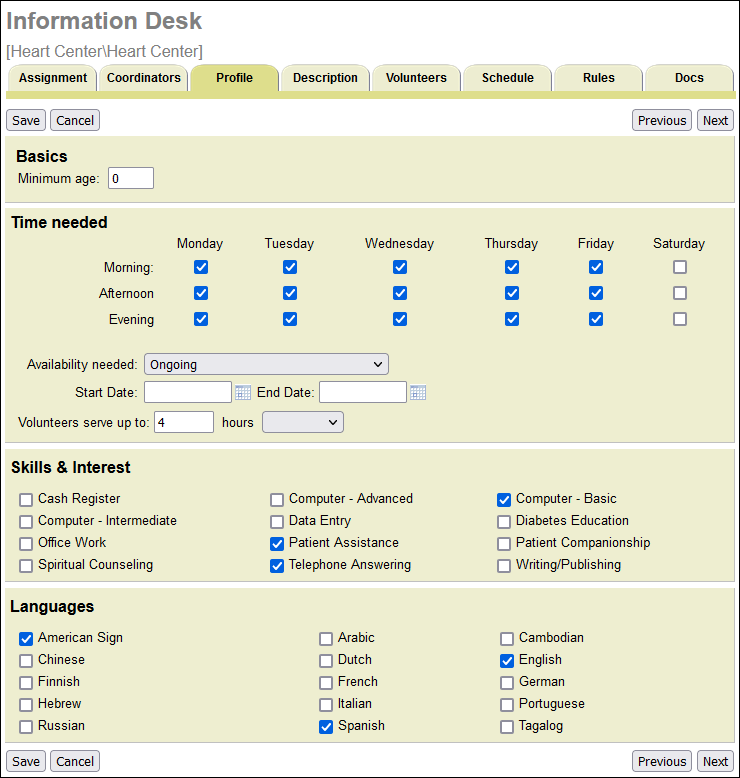
The Profile tab is unique to Assignment records, and this tab includes more specific information about the Assignment. For example, this tab will include information about age requirements, times that volunteers are needed to serve, and required skills.
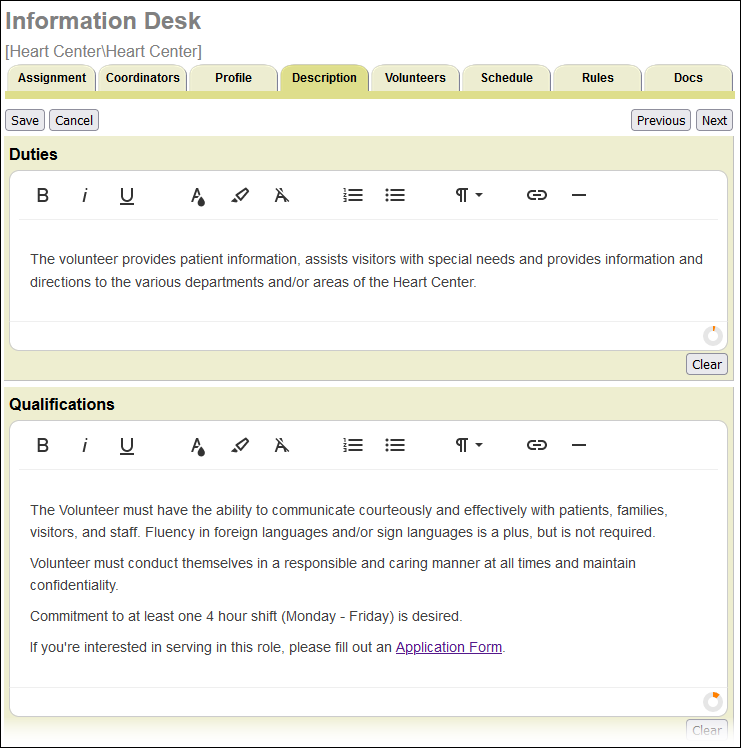
The Description tab is also unique to Assignment records. This tab lets you compose long-form or narrative information about your Assignment. This is ideal for sharing information about the duties, expectations, and qualifications of your Assignments.
Tip!
The fields on the Description tab allow you to add rich text formatting. It may be helpful to include links to your online application forms in these descriptions to encourage prospective volunteers to register with your organization.
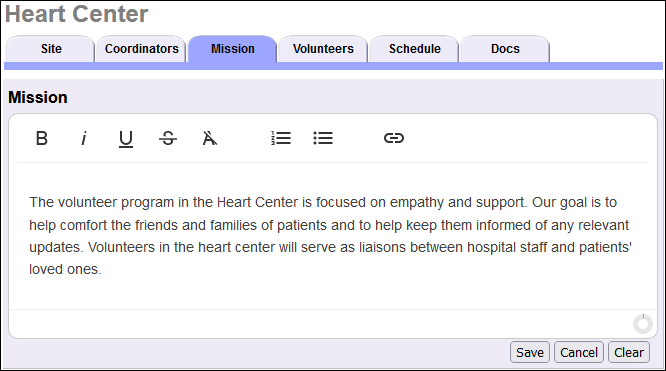
The Mission tab is found in your Site and Place records and is similar to the Description tab. This tab has a single text field that allows you to provide narrative information about your Sites and Places.
To access a Site, Place, or Assignment record and add information:
- Choose Assignments from the menu.
- Click the link for the record you'd like to add information for.
- Select the tab you want to add information to.
- Add information to the fields you'd like.
- Click the Save button.
You can repeat these steps for each Site, Place, and Assignment record you'd like. If you're only updating Assignment records, you can select Assignments from the menu to navigate to a different Assignment, or click the Previous or Next button to move to a new Assignment.
In addition to the information on these tabs, each profile in the directory can include a Schedule tab that displays the opportunity's unfilled openings. You can create openings in your Assignment schedules to designate the dates, times, and number of volunteers you'll need to serve.
Configure Opportunity Directory Settings
Now that you have selected which opportunities to include and added information, you can configure your Opportunity Directory settings. With these settings, you can choose which fields you want to include in Assignment profiles.
To access these settings:
- Choose Setup from the menu.
- Expand Opportunity Directory.
- Click the Ground Rules link.
Below we'll go step-by-step through the different options you can configure.
Appearance
In the Appearance section, you can choose how to organize information in the directory and customize headings and instructions.
Page Title
Here you can enter the heading that you'd like to appear at the top of the Opportunity Directory.
List Opportunities...
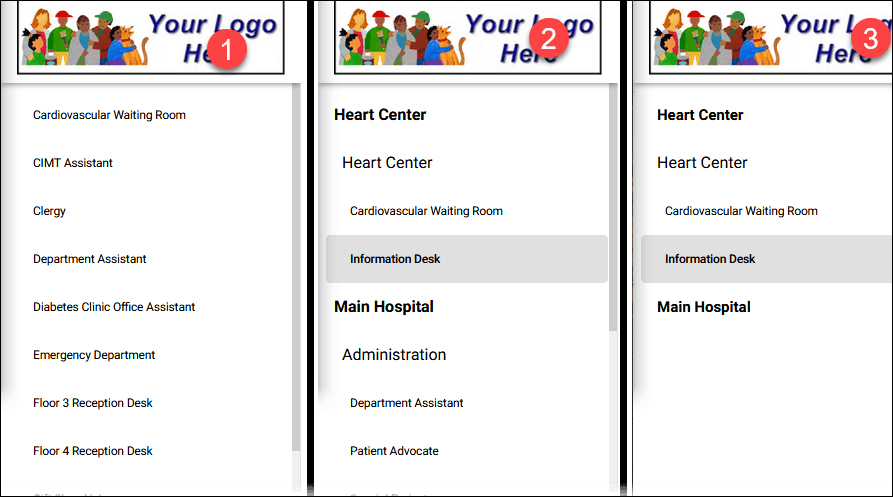
These options let you choose how your opportunities will be organized in the Opportunity Directory menu and include the following:
- As a alphabetical list. With this option, your Assignments will be listed in alphabetical order without any regard to the Sites and Places they are organized under. Since Sites and Places are not used to organize Assignments with this option, your Opportunity Directory will not include profiles for your Sites and Places when this is selected.
- By Site and Place. This option will organize your Assignments so that they appear in your Site, Place, and Assignment hierarchical structure. This list will look very similar to the Assignments page within your account. This option will include profiles for Sites and Places.
-
By Site in an expandable format. This is very similar to the By Site and Place option, but by default the list will only show your Sites with advertised Assignments. Each Site can be expanded to show the Places and Assignments under it. This option will include profiles for Site and Place records, and it can be particularly helpful if you have a large number of Sites.
Page instructions
This section lets you customize the content that appears on the page volunteers will see when they first access the Opportunity Directory. Use the rich text editor in this section to add any information you'd like about how to use the Opportunity Directory or provide more general information about your organization.
Tab Visibility
Here you can choose which tabs will be available for each opportunity in the directory. The following tabs will be available:
- Profile Tab: This tab includes the details from the Site, Place, Assignment, Profile, Description, and Mission tabs of your records. You'll likely want to include this tab if you are using the directory since this is the primary area to share information about each of your opportunities.
- Schedule Tab: This tab shows the unfilled schedule openings for the Site, Place, or Assignment. Volunteers will not be able to schedule themselves for shifts or see other scheduled volunteers on this tab. They can only see the shifts that have not been filled yet. Volunteers can sign-up for shifts and see other scheduled volunteers through VicNet or VicTouch.
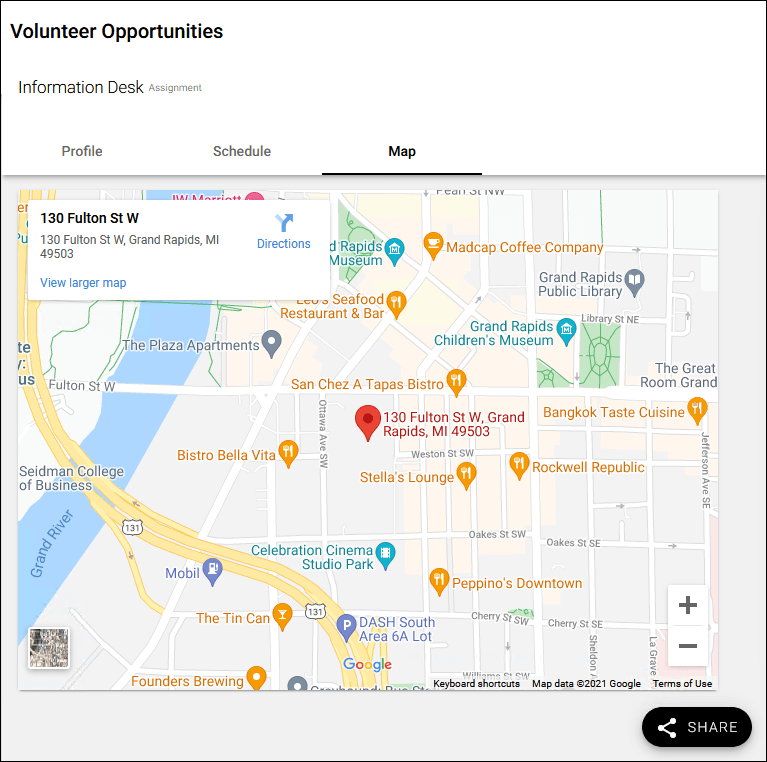
- Map Tab: If you choose to include address information for your Site, Place, and Assignment records, this tab will display the location of that opportunity on an interactive map. Volunteers will be able to zoom in and out to get a better idea of where that opportunity takes place, and they can even request directions.
Check the boxes for the tabs that you'd like to include for each Assignment.
Profile Tab Field Visibility
In this section, you can choose which fields from your Site, Place, and Assignment records you'd like to include in the advertised profiles. Simply check the boxes for each of the fields you'd like to include.
You can optionally include Coordinator fields as well. These fields let you include information about each of the Coordinators assigned to the Site, Place, or Assignment. If you choose to include these fields, you'll need to review your Coordinator records to make sure they have the necessary information.
Phone Fields
A phone field will only be included in a Site, Place, or Assignment's profile if the Ok to call box is checked for that phone field. This is true for phone fields in Site, Place, and Assignment records as well as for Coordinator records. If the Ok to call box is hidden for a phone field, that phone number will be considered Ok to call for the purposes of being displayed in the Opportunity Directory.
If you started a new trial account after January 13, 2023, the Ok to call fields are set to be checked and hidden by default. If you want the fields to appear in your account, you'll need to change the Hidden setting to No.
Links
This section will not include any configurable settings, but it will provide you with all the information you'll need to access the Opportunity Directory and make it available to the public. We'll discuss this in further detail in the Share the Opportunity Directory section below.
Once you're done editing these settings, make sure to click the Save button.
Configure Theming
In addition to being able to configure which fields are included in the Opportunity Directory, you can also customize the color scheme. You can access the Theming options for the Opportunity Directory with these steps:
- Choose Setup from the menu.
- Expand Opportunity Directory.
- Click the Theming link.
Here you can choose the colors you'd like to use for each portion of your Opportunity Directory. If you'd like to learn more about these options, check out Customize Themes for the Opportunity Directory.
Share the Opportunity Directory
Now that your opportunities are set up and your directory settings are configured, you can make the Opportunity Directory available to prospective volunteers. There are a variety of ways you can share the directory. Many organizations choose to make it available on their website. You could choose to include a simple hyperlink or embed the Opportunity Directory within one of your webpages. You can find the information you need to add these kinds of links with these steps:
- Choose Setup from the menu.
- Expand Opportunity Directory.
- Click the Ground Rules link.
- Scroll down to the Links section.
If you'd like to quickly access the Opportunity Directory yourself, you can use the Preview button. This will open a new tab in your browser and navigate you directly to your Opportunity Directory page.
Below this, you'll find the URL for the Opportunity Directory as well as code you can add to your organization's website to create links to the Opportunity Directory. If you'd like to share the Opportunity Directory with interested individuals, you can copy the URL and send it out in an email or share it on your social media. If you'd like to add links to the Opportunity Directory on your website, you can provide the HTML code in the Full-page links section to your organization's web team. Or if you'd like to embed the Opportunity Directory on your website, you can provide your web team with the code in the Embedded links section.
Tips! Share a Specific Page and Use QR Codes
Each profile in the Opportunity Directory includes a Share button that will give you additional options for sharing your opportunities. For example, you could share just one particular profile or just one opportunity's schedule. You'll also have the ability to post opportunities directly to your social media. You can learn more in Opportunity Directory from Send a Link to a Specific Webpage.
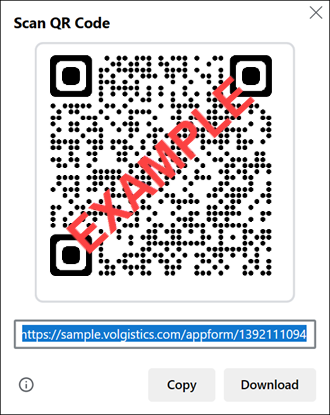
You can also easily convert the URL address for the overall directory or a specific opportunity to a QR code. There's a variety of resources available to do this such as Microsoft Edge or bitly's QR Code Generator. Here's an example of a QR code made using the Edge web browser.
Assignment Profiles in Other Areas
The Opportunity Directory works great as a stand alone resource, but the settings for the directory are also used to display Assignment profiles in other areas of your account. These include:
- Assignment names in the Assignment Preference field on application forms
- Assignment names in the Assignment Preference field on the Profile page of VicNet for volunteers
- Assignment names in the Assignment Preference field on the Volunteers page of VicNet for Coordinators
- Assignment names on the Home page of VicNet for volunteers and Coordinators
- Assignment names on the Schedule page of VicNet for volunteers and Coordinators
- Assignment names in Schedule Reminder messages sent by email to volunteers and Coordinators