Create Custom Reports
Volgistics comes with many Stock report templates already set up that often meet basic reporting needs. In addition to these Stock reports, you can create and save your own custom report templates.
To create a custom report template:
- Select Reports from the menu.
-
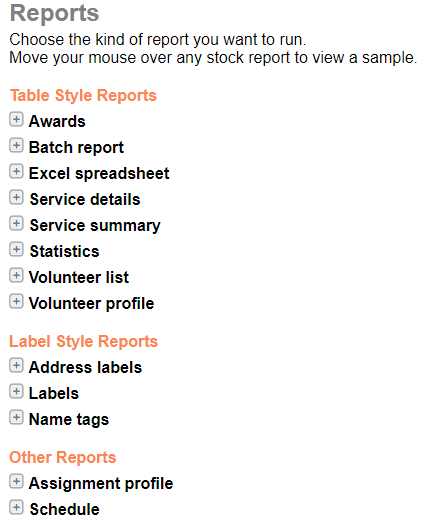
As shown in the illustration below, the Report page lists a series of different kinds of reports, such as Volunteer List and Service Summary. Click on the kind of report you want to create. For example, if you want to create a volunteer list report, expand Volunteer List. Custom report templates must be based on one of the kinds of reports listed on the Reports page.
-
Click the Create a new (report style selected) report link.
- Use the Options, Fields, Page Design and Include pages to customize your report (there's more information about these pages below). Click the Next button on each report setup page to advance to the next page, or the Back button to return to an earlier report setup page.
- When you reach the Save page, enter a name for the report and then click the Save or Save and Run button.
Options Page
Use the Options page to set the basic report structure. The Options page provides different set up options for each different kind of report. For a more specific description of the options for the report you're creating, click the Help link on the Options page. A Help link can be found on other report set up pages also.

Click the Next button once you have selected your report options.
Fields Page
Use the Fields page to select the fields you want to appear on your report. The field options vary depending on the kind of report you are creating. If you do not see the fields you want to select on the Fields page, try starting with a different kind of report.
The fields you select on the Fields page will appear on your report. Choose the fields you need to make your report useful, but be careful not to choose more fields than you really need. When there are many fields selected, the report may need to use a small font or extend to additional pages in order to fit them all in.
Once you have selected all the fields you need on your report, click the Next button.
Page Design Page
Use the Page Design page to select page size, margins, and fonts, and a report title for your report. These settings will only be used if you create a PDF file of the report. They will not matter if you choose to make an Excel spreadsheet file.
Click the Next button when you are finished selecting your page design.
Include Page
While it's possible to include all of the records in your database on the report, you may want a report that includes just certain volunteers (or just certain Sites, Places, Assignment, or service records depending on the kind of report you're customizing). Use the Include page to specify which records you want to include.
The Include page provides different choices for each different kind of report. For a more specific description of the Include options for the report you're creating, click the Help link on the Include page.
When you have all your include options set, click the Next button.
Save Page
When you reach the Save page, enter a name for the report. Report names can be anything that will help you remember what you'll use the report for, or how the report is set up. We recommend using something different than the stock report names so you can find the template you need again!
If the report is one that you'll need every week or month, and the Include page options will update on their own, you can set the report file to be generated automatically.
Tip!
Larger accounts can accumulate a lot of custom report templates, which can clutter the page. While the account holder can delete unneeded templates it may also be beneficial to standardize your report template titles. For example, if the System Operator who makes the template starts each template's title with their initials, all their templates will be grouped together on the page. Or if Site Level Access is enabled, each template's title could be started with the name or intials of the Site.
When you're done with your template, click the Save button. Or if you want to see your file now, click the Save and Run button then the Run Now button. Within moments your report will be sent to your Volgistics In Box.
Reuse Templates
Once you make a custom report template, you can use it again without making a new template. The Include page options allow you to report on different groups of volunteers without making a new report template. Similarly, reports on volunteer service hours and schedule information will have settings on the Include page to make the report cover a different time period each time it is run.
To run a saved report again:
- Choose Reports from the menu.
- Click on the kind of report template you created (e.g. Volunteer List or Service Details).
- Click on the name of the report template.
- Click the Run It button.
- Change any Include page settings you'd like.
- Click the Run Now button.
Related Help
- Mailbox In Box Tab
- Delete Report Templates
- Stop Automatic Reports
- Stock Report Overview
- Limit a Report to the Volunteers in a Set
- Create Automatic Reports